


Learning how to use a franking machine can be straight-forward, we’ve put together a brief guide for people of all experience, whether you have been franking for years or have just popped open your new franking machine delivery.
A franking machine is a very useful, effective and efficient way for businesses to deal with their outgoing post. By franking your letters and parcels you not only lessen your mailing cost but you also give your business a more professional image and you increase the likelihood of the recipient opening the mail they receive from you. If you have bought or rented a franking machine for the first time you may now be wondering what to do next… Here is our step by step guide to using a franking machine.
How To Set Up Your Franking Machine
- Find a good space in the office for the machine, the franking machine will need to be connected to a plug socket and many franking machines often need to be connected to a phone line too. Once the machine is in it’s position and all plugged in you can switch the machine on.
- If this is the first time you’ve ever switched on the machine you will most likely need to setup and configure it. Follow the onscreen instructions in order to do the initial start up and installation. Once this is done you need to make sure the postage rates are correct and you may be given the option to put in any advertising messages or logos you wish to use on your mail.
- If your machine is configured and the postal rates are accurate and up to date you can now load credit onto your machine. This should be a simple download of funds via the phone line or network connection. There is usually an ‘add postage’ or ‘postage refill’ option on the menu of the machine, where you can enter the desired refill amount and the top up will be complete.
- Install ink cartridges. Some franking machines require that you put two ink cartridges in ready for use. Once the ink cartridges are securely in the franking machine you can do a test print to make sure they are correctly aligned and producing crisp, clear prints.
- Choose the message or logo you wish to appear on the envelope and you can pre-save a number of messages ready for future use too.
- You are now ready to frank your mail.
Franking your mail
- It is a good idea to do a test run first if you have not used the franking machine before just to be sure and confident that the franked mark will come out right.
- Weigh the item you wish to frank – most franking machines have a built in scale and others will have an easily attached external scale.
- Use the control panel to select the class and mail type (1st class, large letter).
- Select the logo or message you wish to be printed on the envelope.
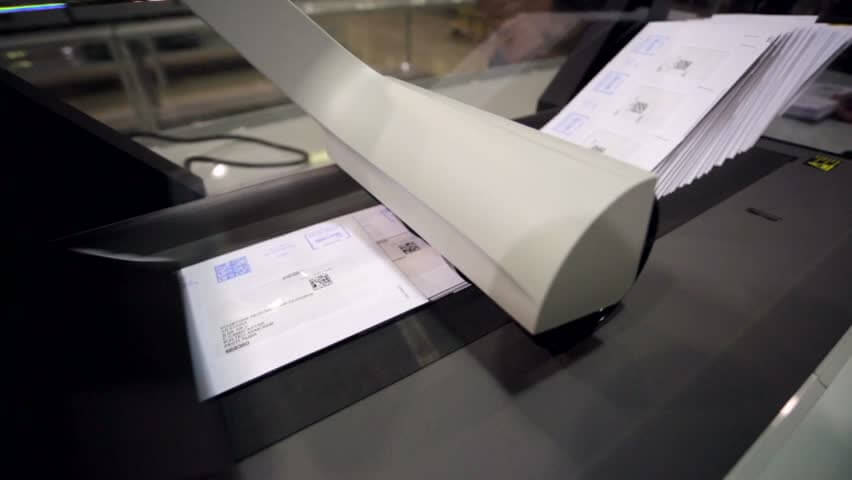
- Place the letter (upwards facing) on the feed deck or into the printing area if it is a manual franking machine.
- Check the franking mark. It should be on the top right hand corner of the envelope and it should be crisp and clear. If you have an automatic franking machine the envelope will go from the feeder tray to the stacking tray automatically.
- Prepare the franked mail for posting or collection. This is by separating the mail via class and size and putting them into pouches, bags or trays. Full information on preparation of franked mail can also be found on this website.
This is an overview on how to use a franking machine, once you have used the machine a few times and have become acquainted with the menu screen you will find operating the franking machine straightforward. You will also build in confidence and soon you’ll be happy franking large amounts of mail in a short period of time.
A new piece of equipment can seem daunting at first but you will find a franking machine will really benefit your business and the employees due to less time being spent sorting mail and more time being spent focussing on the business.
Each franking machine model is different so make sure you follow the instructions for that particular model. Some franking machines will alert you to low ink and low postage credit which helps you to keep everything topped up and keeps the mail moving along smoothly.
Some machines are completely manual, others are entirely automatic and some you can buy lots of optional extras that attach onto the main model so be aware of these things when you are setting up your machine for the first time. If you do encounter problems with your franking machine the best thing to do is contact your supplier for advice.